Setup guide
Installing Nomad & activating Nomad Pro
A step-by-step guide for your GL-E5800 (“Mudi 7”) router.
≈10 minutesRouter · phone or laptop · Pro key
root@Mudi7:~#wget -O /tmp/nomad_<version>_all.ipk <link>
nomad_<version>_all.ipk  100%  |============|
root@Mudi7:~#opkg install /tmp/nomad_<version>_all.ipk
Installing nomad (latest)…
Configuring nomad… done.
root@Mudi7:~# nomad status
● nomad · running pro: not activated
Install over SSH — Method C
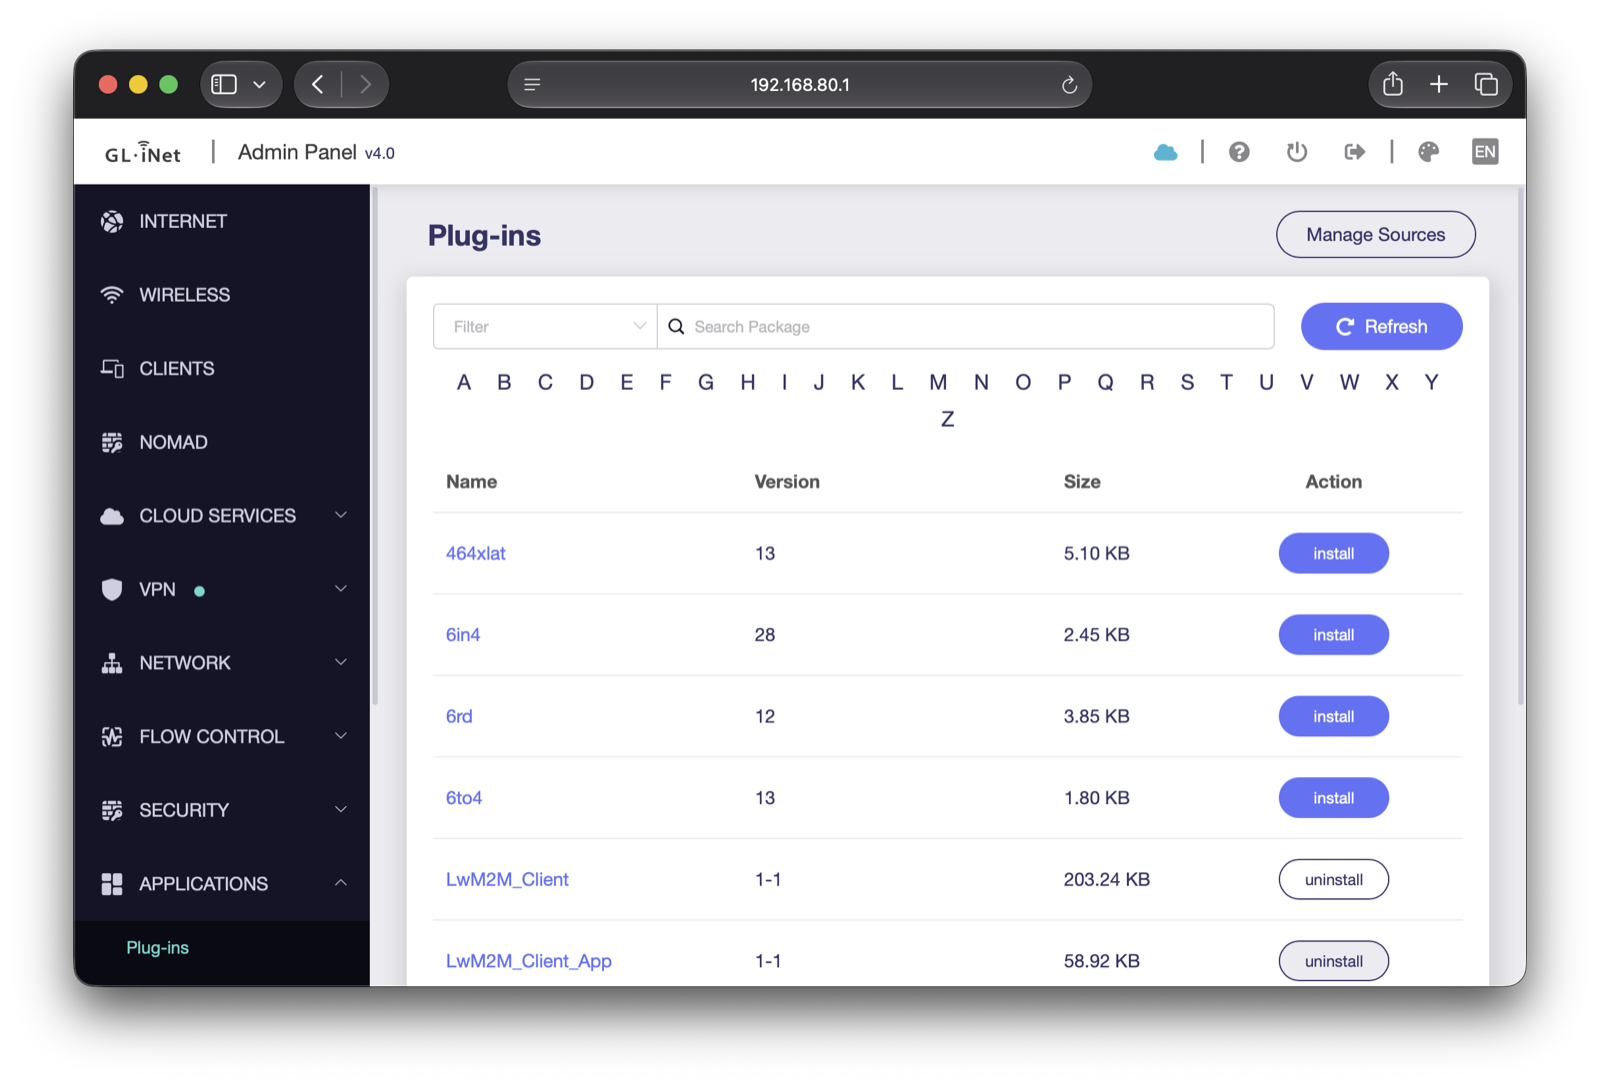
Router web admin — Method B
Before you start
Make sure you have:
A GL-E5800 (“Mudi 7”) router, powered on.
A phone or laptop connected to the router’s Wi-Fi (or to its LAN port).
Your Nomad Pro key — it looks like NOMAD-XXXX-XXXX-XXXX. It was sent to you in your purchase confirmation email.
The Nomad package (nomad_<version>_all.ipk) — the download link is in your purchase confirmation email and on the payment page where your key was issued. (You don't need this file if you install with the Nomad Companion app — see Method A.)
The router should have internet access during activation (it needs to reach the licence server once; after that Nomad Pro works fully offline).
Your Nomad Pro key looks like
NOMAD-XXXX-XXXX-XXXX
Which router? Nomad is developed and verified on the GL-E5800 (Mudi 7). Other GL.iNet models are a work in progress and not recommended yet.
1
Step 1
Install Nomad on your router
Pick one of the three methods below. Method A is the easiest; Method B needs no terminal; Method C is for advanced users.
Choose one method — you don’t need to do all three
- 1Install Nomad Companion from the App Store on your iPhone.
- 2Connect your phone to the router’s Wi-Fi.
- 3Open the app and choose Add router → the app finds your Mudi 7 on the local network.
- 4Tap Install Nomad. The app installs the Nomad agent on the router and pairs with it automatically.
- 5When it finishes, the app shows your router as connected. You’re ready for Step 2.
The app talks to the router only over your local network — nothing leaves your device. If the app isn’t available for you yet, Methods B and C give the same result.
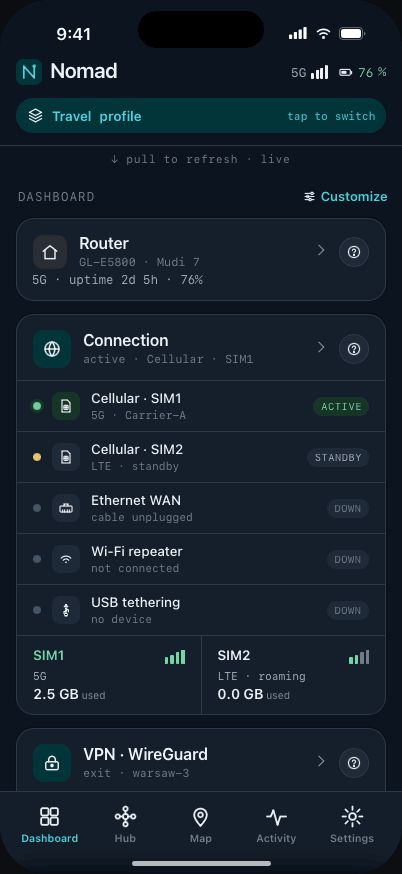
Connected — real render
- 1On your computer, open the router’s admin panel at http://192.168.8.1 and log in with your router password.
- 2Go to APPLICATIONS → Plug-ins and click Manage Sources.
- 3Choose Add Custom Software Source: enter a Name (e.g. nomad) and the package source URL from your purchase email, press +, then Apply.
- 4Back on the Plug-ins list, search for nomad and click install. Nomad enables the right services for your device automatically.
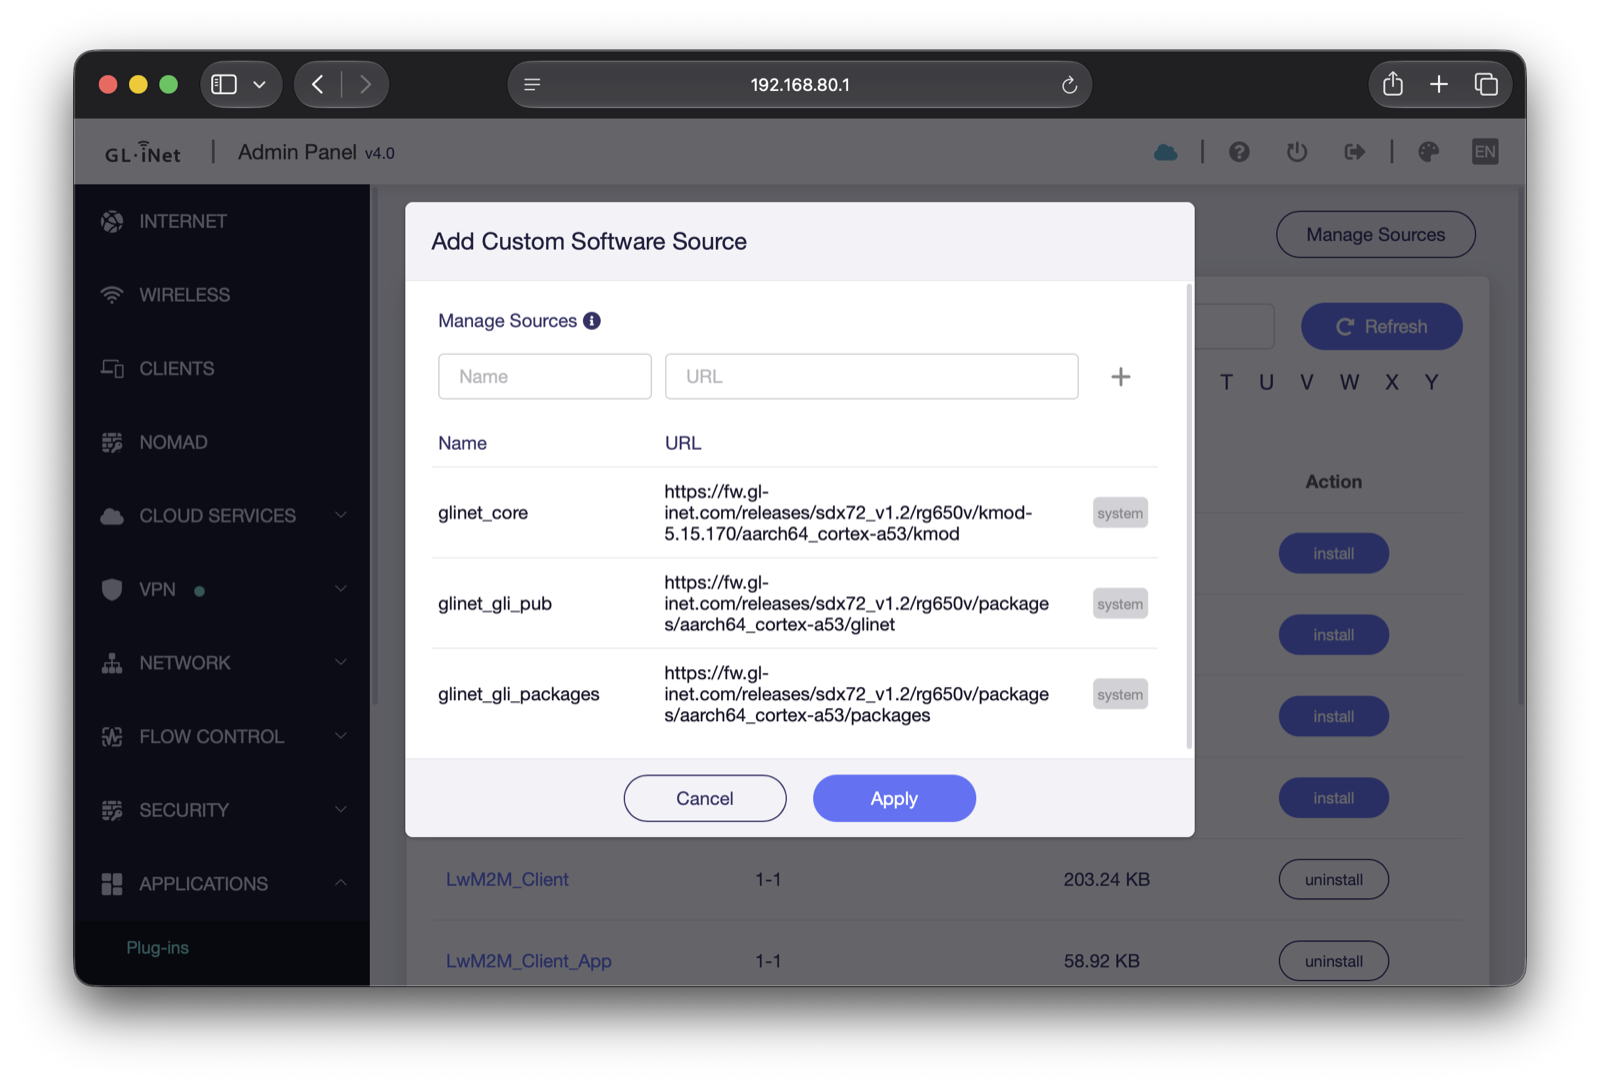
GL.iNet — Add Custom Software Source
GL.iNet Plug-ins — install
From your computer, copy the package to the router and install it (the GL.iNet default address is 192.168.8.1):
Enable SSH first: GL.iNet routers ship with SSH off. In the router admin panel (http://192.168.8.1) set the admin password, then enable SSH under System → Advanced Settings — the root password equals the admin password.
scp -O nomad_<version>_all.ipk [email protected]:/tmp/ssh [email protected] 'opkg install /tmp/nomad_<version>_all.ipk'
Or install from the router itself — SSH in and download the package with wget (link from your email):
wget -O /tmp/nomad_<version>_all.ipk <your download link>opkg install /tmp/nomad_<version>_all.ipk
(Optional) verify the signature before installing:
openssl pkeyutl -verify -rawin -pubin -inkey release.pub \-in nomad_<version>_all.ipk -sigfile nomad_<version>_all.ipk.sig
2
Step 2
Open Nomad
You can control Nomad from any of these — use whichever suits you:
Where
How to open it
Nomad Companion app
Open the app (already paired in Method A).
Nomad Web UI
Open it in your browser at https://192.168.8.1:8765 (accept the one-time self-signed-certificate warning) — the Nomad Web UI runs right on the router, so no separate admin panel is needed.
Router screen (LCD)
Press the power button 3 times within 6 seconds, or pick Nomad in the router’s on-screen menu (enabled by default).
To check everything is running, the app/web shows your router status; on SSH you can run nomad status.
192.168.8.1:8765
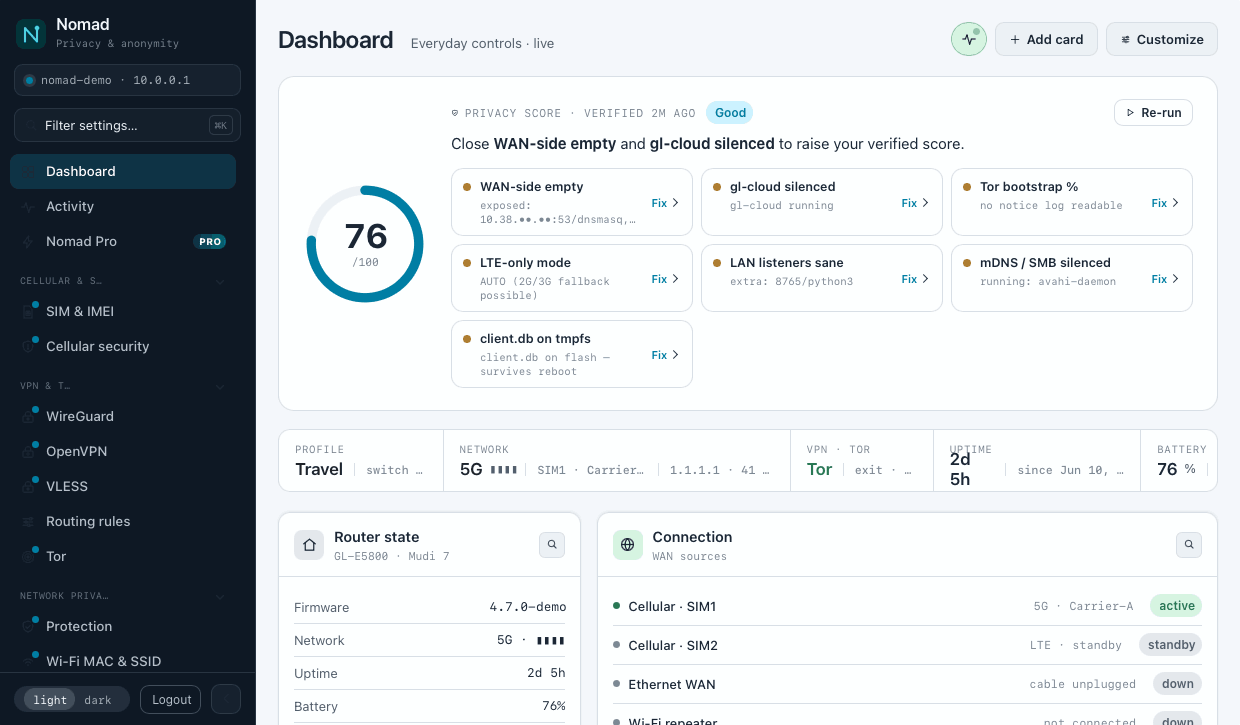
Web interface — real render
3
Step 3
Activate Nomad Pro
Activation unlocks the Pro features. Use one method — you only activate once, and the licence is then tied to this router.
Choose one method — you don’t need to do all three
- 1Open the app and go to Nomad Pro (or tap a locked Pro feature).
- 2Tap Activate Pro.
- 3Type or paste your key NOMAD-XXXX-XXXX-XXXX (you can also scan it if you have a QR code).
- 4Tap Activate. After a few seconds the app shows Pro active and the locked features open up.
Nomad Companion app
NOMAD-XXXX-XXXX-XXXX
Activate
Nomad Companion app
- 1Open System ▸ Nomad Pro.
- 2Enter your key and press Activate.
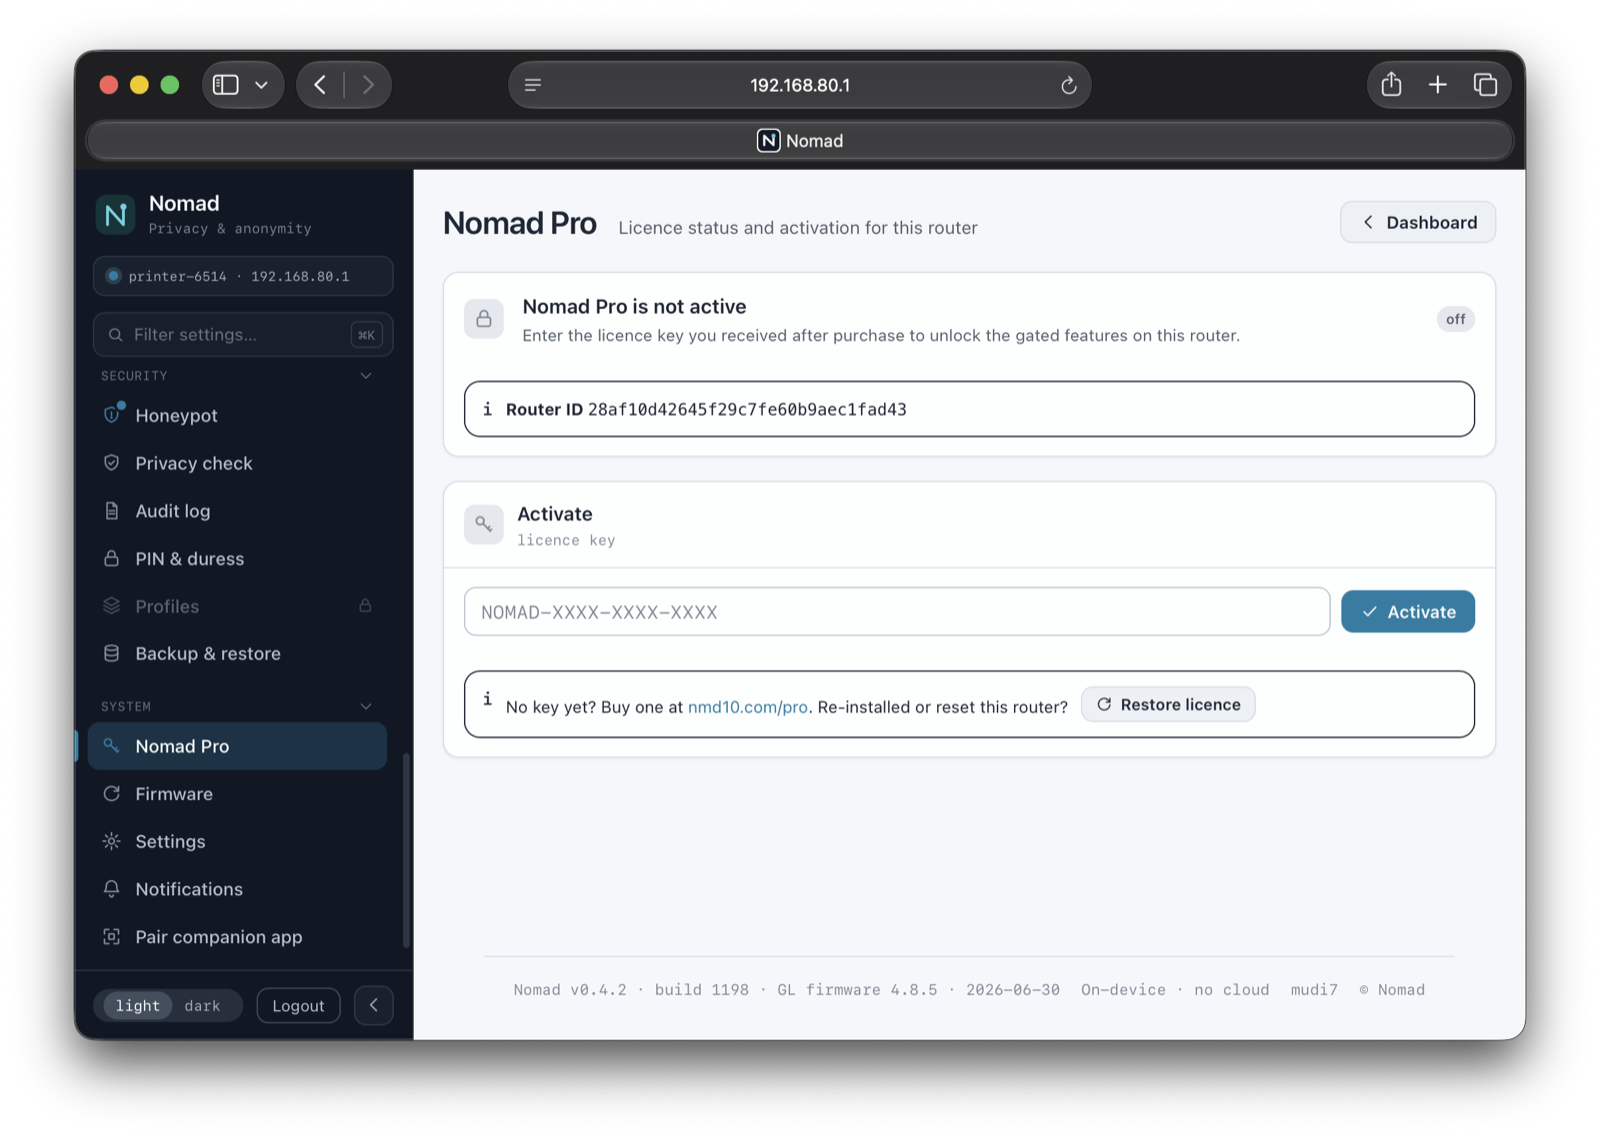
System ▸ Nomad Pro — real render
- 1Open the on-screen menu (power button ×3) and choose Nomad Pro.
- 2The screen shows a QR code for this router. Scan it with your phone to finish activation from the app or web — no need to type the key on the small screen.
Nomad Pro● PRO
Scan to activate Pro · no key typing
This router · QR
nomad pro activate-key NOMAD-XXXX-XXXX-XXXXnomad pro status # should show active: true
What to expect: activation needs the internet once. Your key binds to this one router — a key can’t be reused on a second device. After activation, Nomad Pro keeps working even fully offline.
4
Step 4
Confirm Pro is active
- In the app / web: the Nomad Pro page shows Active, and the previously locked features (advanced VPN, Tor+, Cellfence, rules, BTS location, LAN isolation, Pro profiles, the IMSI-catcher detector and Push+ alerts) are now available.
- On SSH: nomad pro status reports active: true.
That’s it — you’re done. 🎉
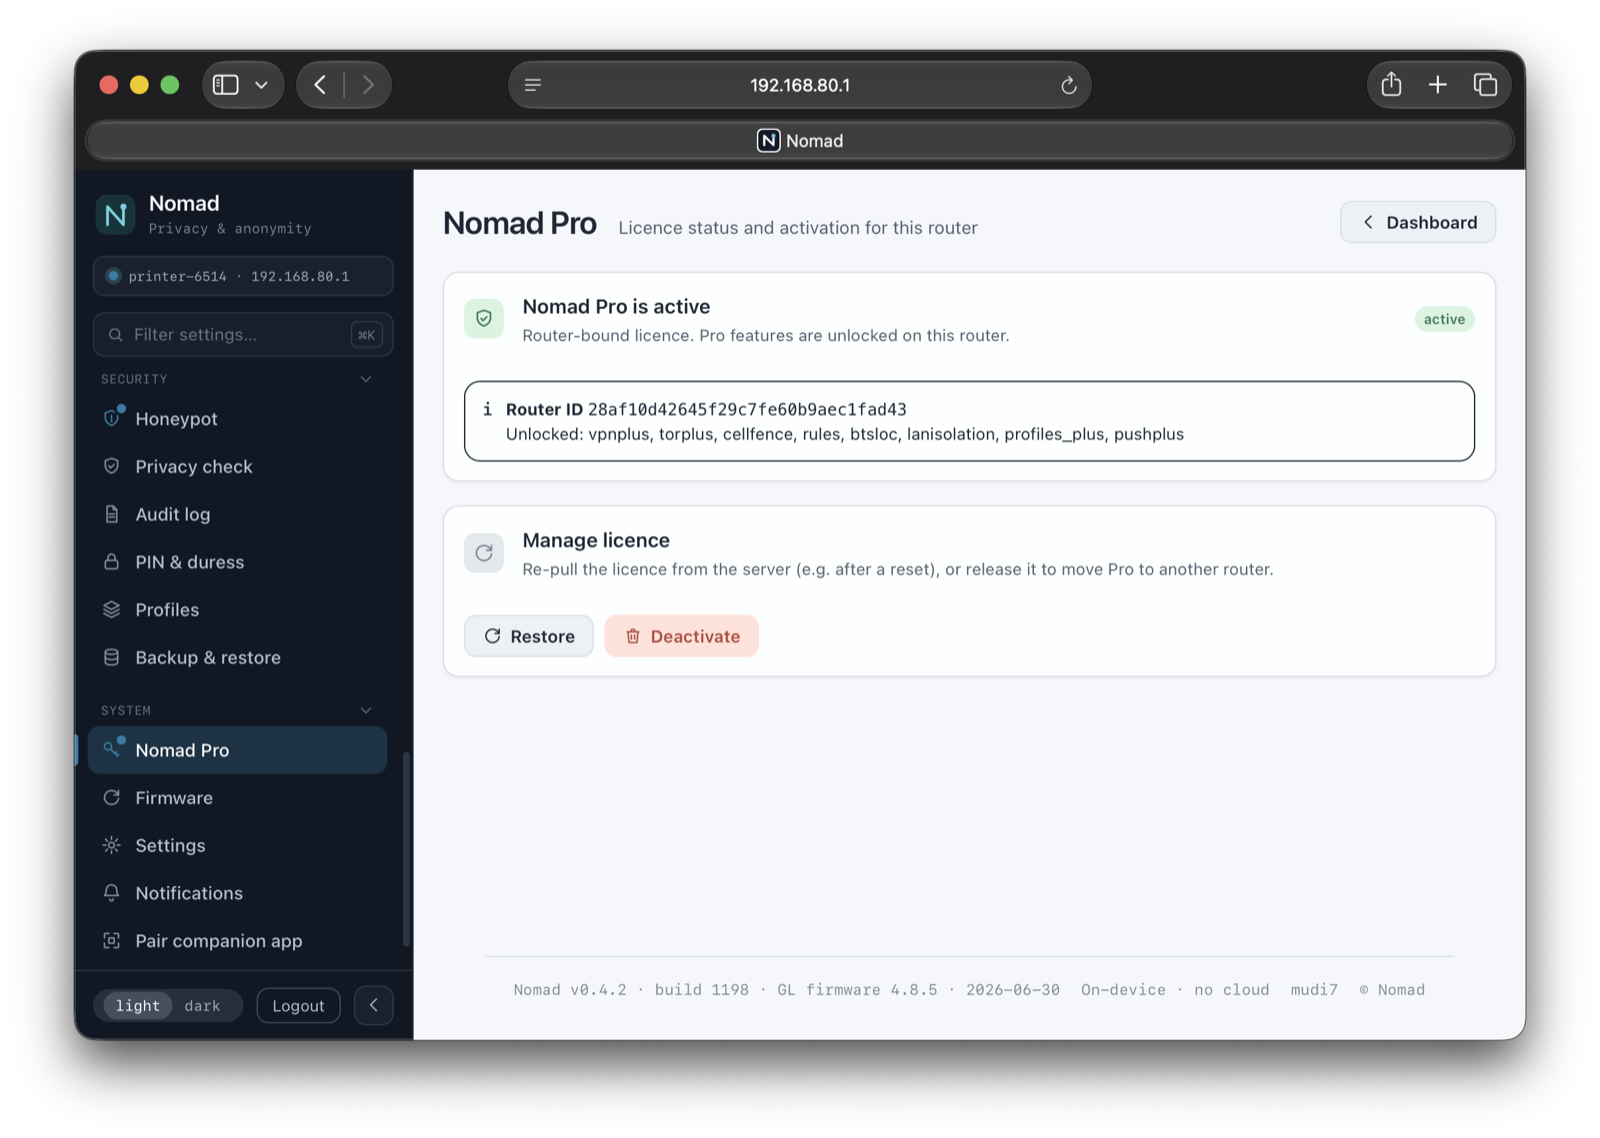
Nomad Pro — real render
Troubleshooting & FAQ
Each key activates one router. If you’re moving Nomad to a new router, first release it on the old one (Deactivate in the app / web, or nomad pro deactivate), then activate on the new router.
The router needs internet during activation. Check the router is online and try again. Once activated, this is never needed again.
Reinstall Nomad (Step 1), then restore your licence with Recover in the app / web, or nomad pro recover over SSH. No new key is needed.
It’s in your purchase confirmation email and on the payment page where your key was issued.
No. The Nomad agent runs on the router itself. The app, web page and screen are just ways to control it.